
How to apply 3D LUTs in Adobe Premiere Pro
There are many ways to apply 3D LUTs in Adobe Premiere Pro. Adobe Premiere Pro CC and above support 3D LUTs natively. How to apply a 3D LUT to your footage inside Premiere Pro. Have in mind that Premiere Pro refers to applying a 3D LUT as Lumetri Color or Lumetri panel LUT. In the following you will learn how to use LUT in Adobe Premiere.
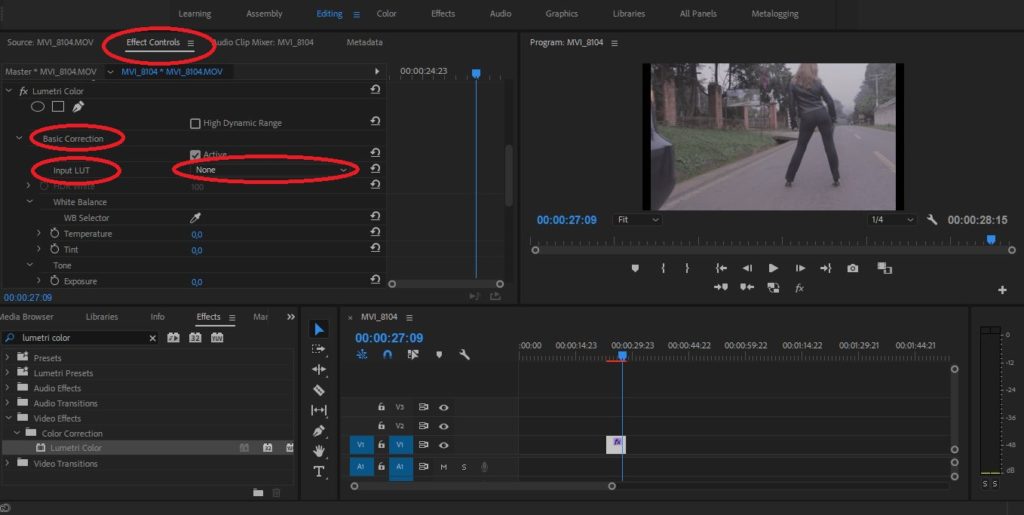
Adding a Lumetri Color LUT effect to the clip
- Load your project
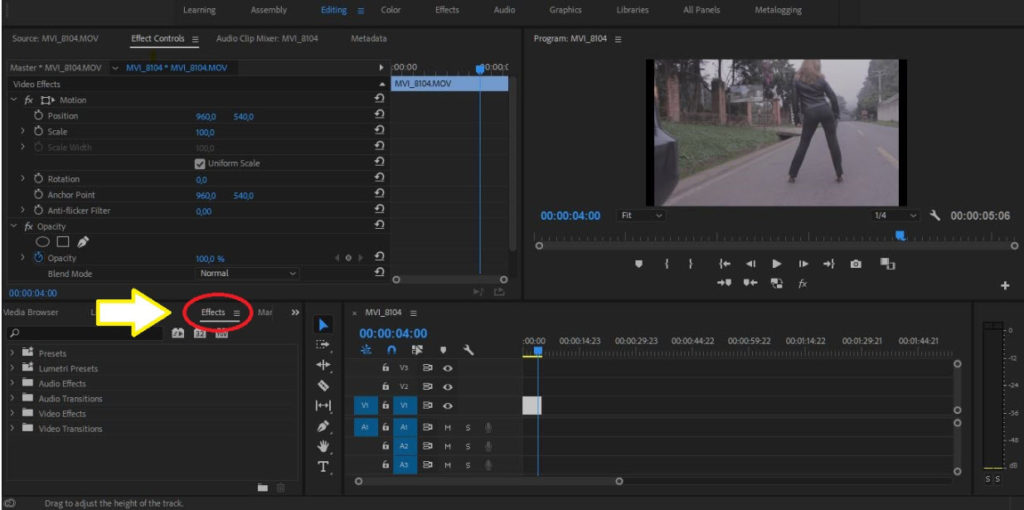
- Open the Effects tab
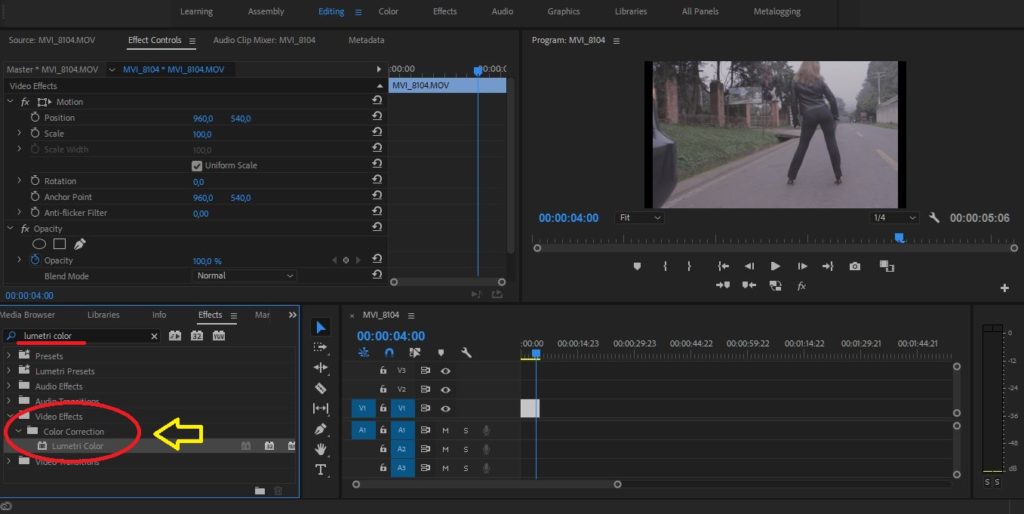
- Go to Video Effects > Color Correction > Lumetri Color or write Lumetri Color
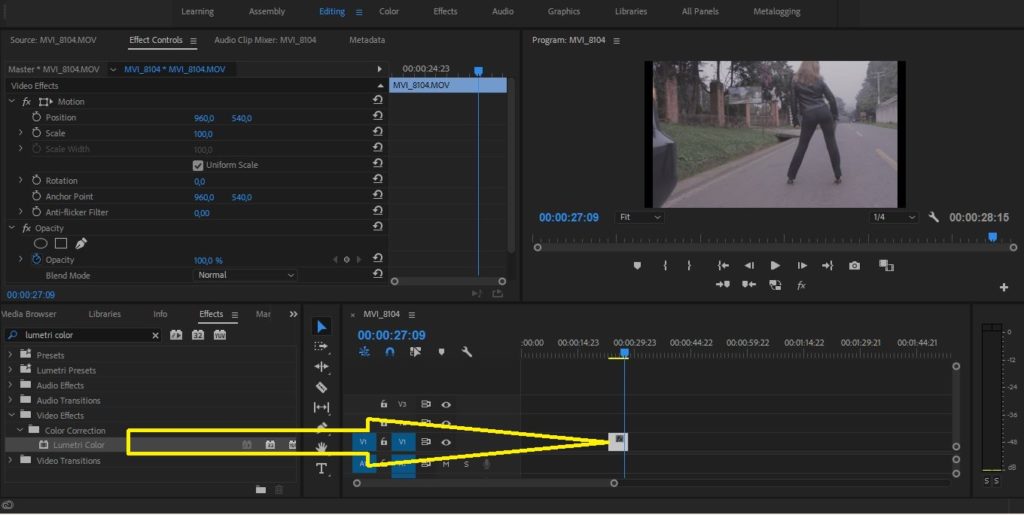
- Drag the Lumetri Color effect onto your clip
- Under Effects Control load the 3D LUT you’d like to apply to your footage.
- If you’re loading a Camera to Alexa Color space LUT, go to Basic Correction > Input LUT > Browse and choose the desired converter LUT.
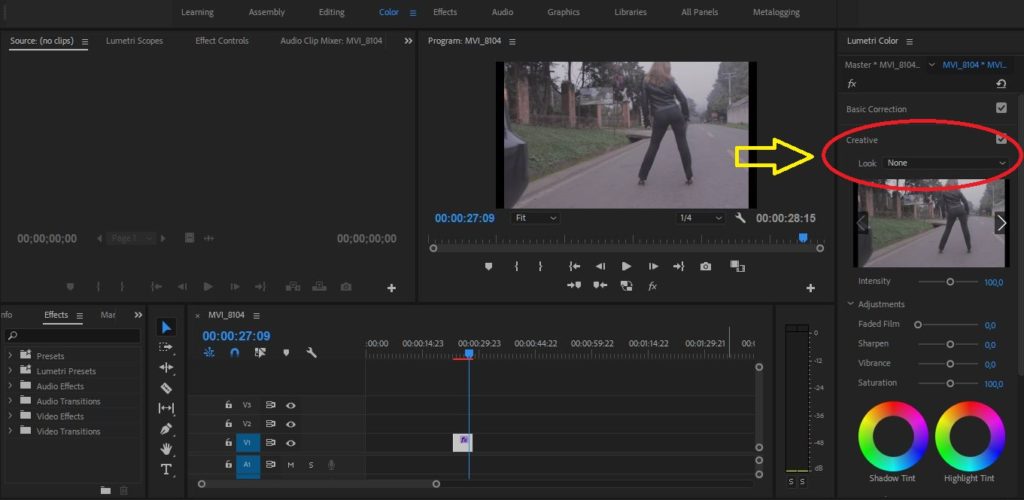
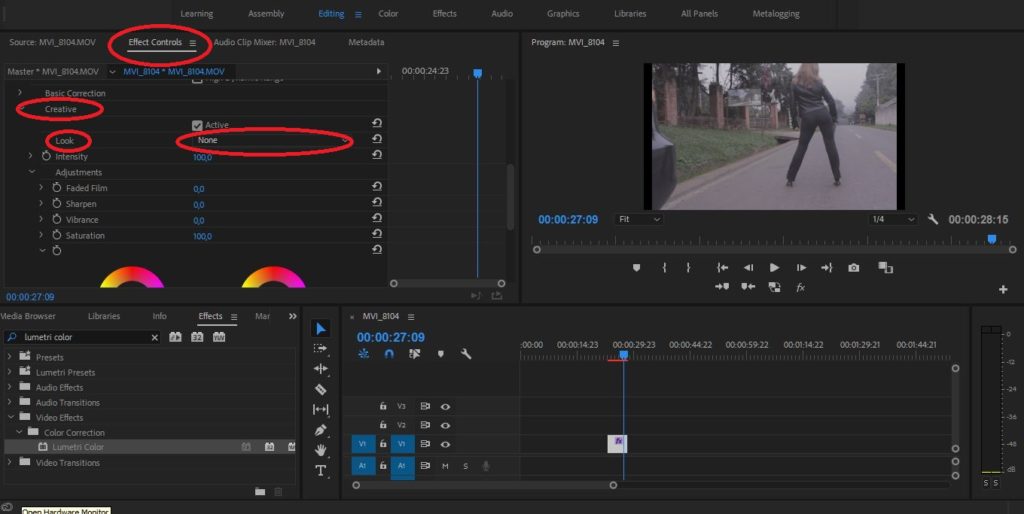
- If you’re loading a creative LUT, go to Creative > Look > Browse and choose the desired creative LUT.
- Your LUT is applied
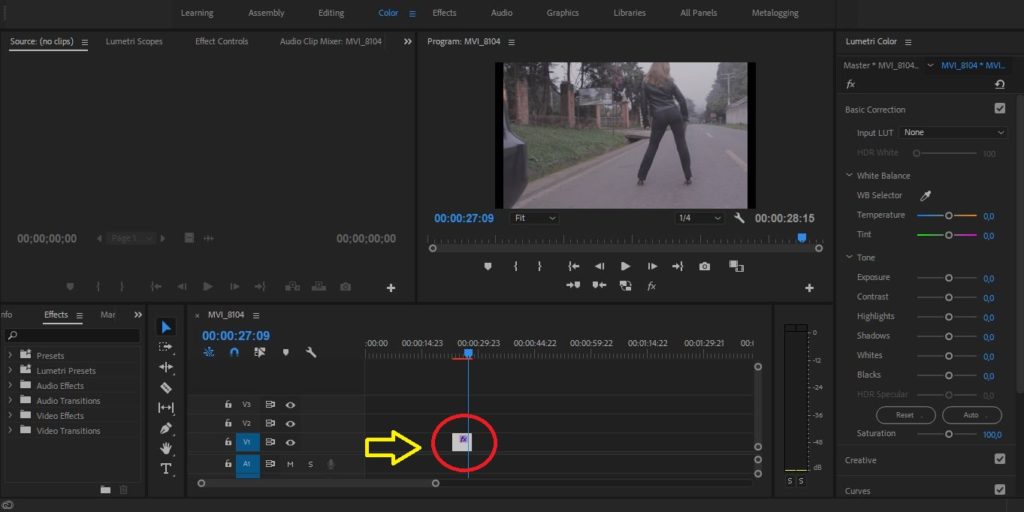
Using the Color interface tab (from Premiere Pro CC 2015 or later)
- Load your project
- Click on the Color interface tab or go to Window > Workspaces > Color or press Alt + Shift + 3.

3. Select your clip
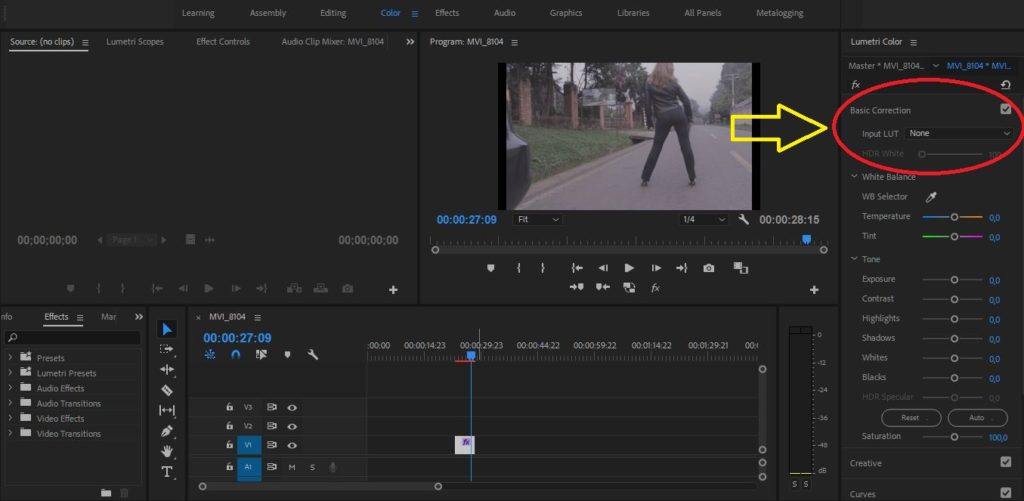
4. If you’re loading a Camera to Alexa Color space LUT, go to Basic Correction > Input LUT > Browseand choose the desired converter LUT.
- If you’re loading a creative LUT, go to Creative > Look > Browseand choose the desired creative LUT.